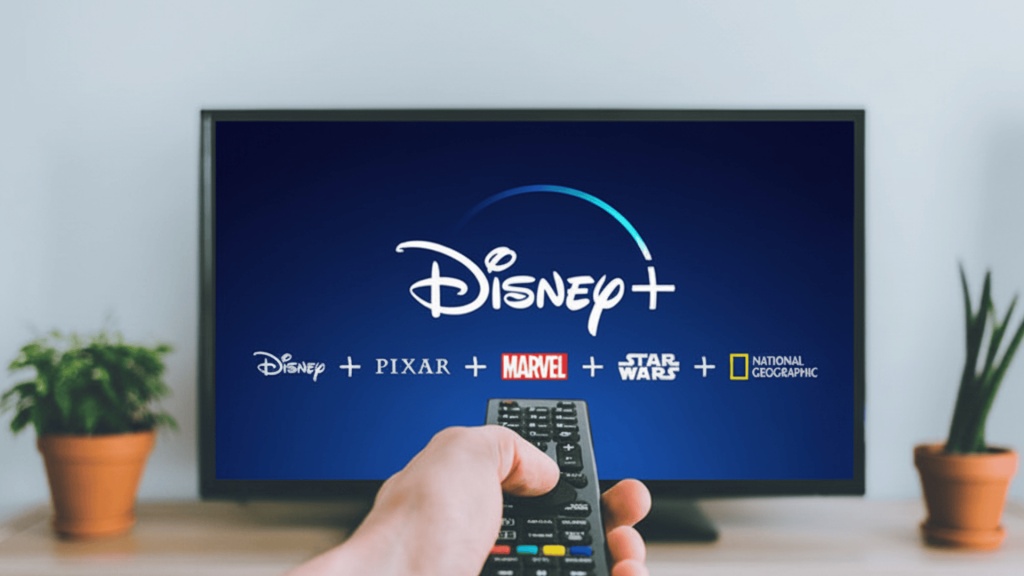
Watching Disney+ on a small phone screen can take the fun out of movie night. That’s why many people look for easy ways to move their favorite shows and movies onto a bigger TV screen.
If you’ve ever asked how to cast Disney+ to TV, this blog post is made for you.
Casting lets you play Disney+ from your phone, tablet, or laptop directly on your TV using tools like Chromecast or AirPlay.
It sounds simple, but small setup issues can cause confusion or stop it from working.
This blog breaks everything down in a clear way. You’ll learn can to cast Disney Plus, how Disney Plus Chromecast works, and what to do if casting fails.
By the end, you’ll have clear steps to stream Disney+ smoothly and fix common problems fast.
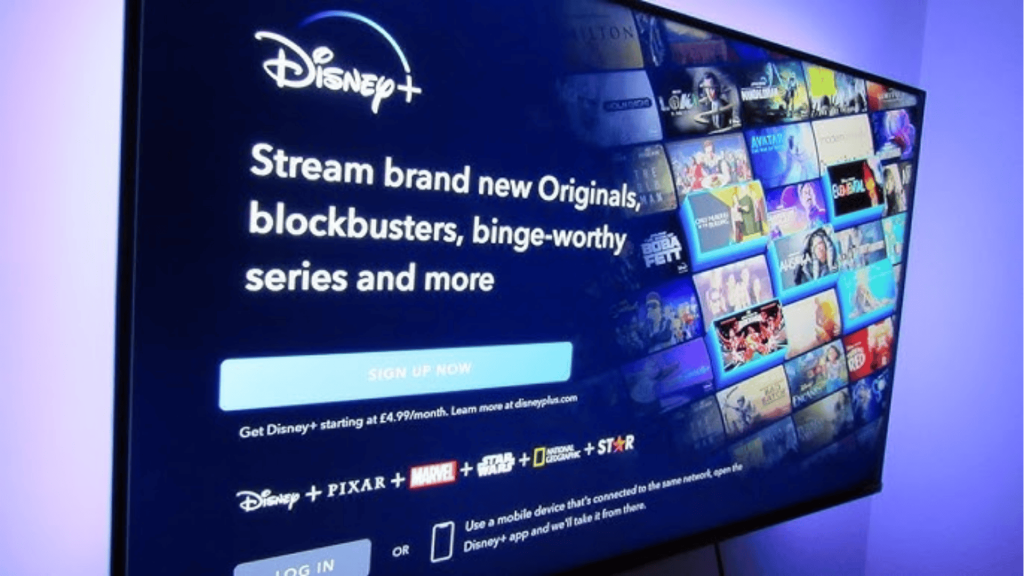
What Does It Mean to Cast Disney+ to TV?
Casting Disney+ to a TV means sending a movie or show from your phone, tablet, or laptop to play directly on your TV screen.
Instead of watching on a small display, the video appears on the TV while your device acts as a controller.
You can pause, play, or change volume without touching the TV remote, which makes group watching easier.
When you cast Disney+, the content streams through your Wi-Fi connection using features like Chromecast or AirPlay.
Only the video is sent to the TV, not your full screen. This is different from screen mirroring, where everything on your device shows on the TV.
Casting usually gives clearer video and more stable playback.
Can You Cast Disney+ to TV?
Yes, you can cast Disney+ to your TV using supported devices like Chromecast, AirPlay, or smart TVs with built-in casting.
To cast Disney+ to a TV, you need a few basic things set up first. You must have an active Disney+ account and a TV or streaming device that supports casting.
Your phone, tablet, or computer should be connected to the same Wi-Fi network as your TV.
Disney+ works with Chromecast, Apple AirPlay, and many smart TVs that already have the app installed. Once everything is connected, casting only takes a few taps.
If the cast option does not appear, updating the app or checking your Wi-Fi usually fixes the issue. This method lets you watch Disney+ on a larger screen with better comfort.
How to Cast Disney+ to TV Using Chromecast?
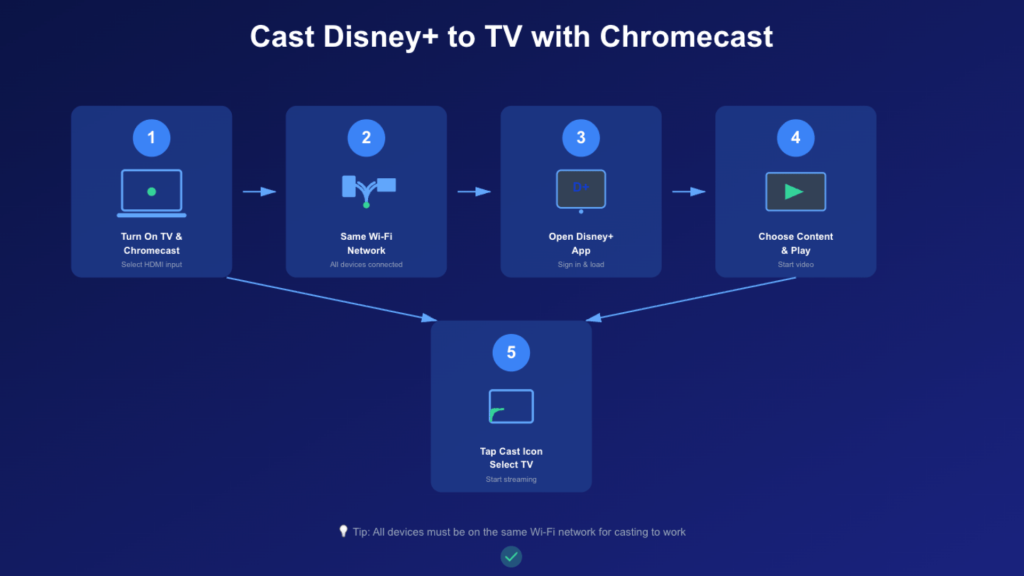
This section walks you through five simple steps to cast Disney+ to your TV using Chromecast, helping you stream your favorite shows without setup confusion.
Step 1: Turn On Your TV and Chromecast
Start by turning on your TV and selecting the HDMI input where your Chromecast is connected.
If your TV has Chromecast built in, open the TV settings and confirm it is turned on. This step prepares your TV to receive the stream.
If the wrong input is selected, your device may not show up when casting. Taking a moment to check this first helps avoid connection issues later.
Step 2: Connect All Devices to the Same Wi-Fi
Make sure your phone, tablet, or laptop, and your TV are connected to the same Wi-Fi network.
Chromecast only works when both devices share one network. If they are on different networks, the cast icon may not appear at all.
A steady Wi-Fi connection also helps reduce buffering and keeps the video playing smoothly while you watch Disney+ on your TV.
Step 3: Open Disney+ on Your Device
Open the Disney Plus app on your phone or tablet, or use the Chrome browser on a laptop. Sign in to your account and wait for the home screen to fully load.
It’s important to use the latest version of the app or browser, as older versions can cause missing cast options or playback problems during streaming.
Updates often fix small bugs that affect casting.
Step 4: Choose the Show or Movie
Pick the movie or TV show you want to watch and start playing it on your device.
The cast option usually appears only after the video begins playing. This step activates the player controls needed for casting.
If the cast icon does not show up, pause the video, wait a few seconds, and press play again to refresh the player screen.
Step 5: Tap the Cast Icon and Select Your TV
Tap the cast icon shown on the Disney+ video screen and wait for the list of available devices to appear. Select your Chromecast or TV from the list.
After a few seconds, the video will start playing on your TV.
Your phone, tablet, or laptop will then act as a controller, allowing you to pause, play, rewind, fast-forward, or adjust the volume while watching on the bigger screen.
How to Cast Disney+ to TV Using AirPlay?
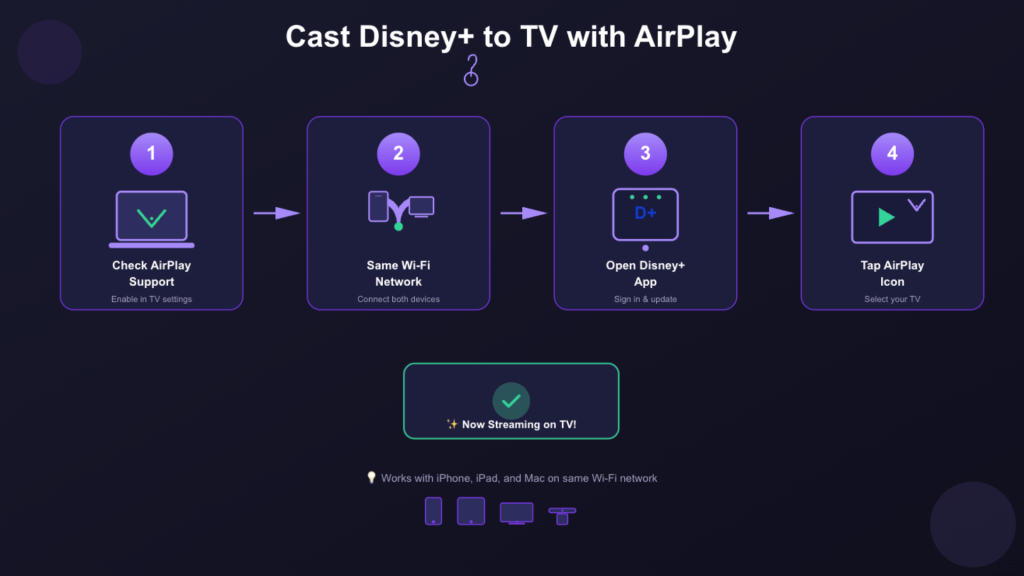
This section explains how to cast Disney+ to your TV using AirPlay, with simple steps to help Apple device users stream smoothly on a bigger screen.
Step 1: Check AirPlay Support on Your TV
Begin by confirming that your TV supports AirPlay or is connected to an Apple TV.
Many newer smart TVs include AirPlay support by default. Turn on the TV and open the settings menu to check that AirPlay is enabled.
This allows your iPhone, iPad, or Mac to detect the TV when you try to stream. If AirPlay is turned off, your TV will not appear in the list of available devices.
Step 2: Connect Devices to the Same Wi-Fi
Make sure your Apple device and TV are connected to the same Wi-Fi network. AirPlay depends on a shared network to send video properly.
Open Wi-Fi settings on both devices and confirm the network name matches.
If the networks differ, AirPlay will not connect. A stable Wi-Fi connection also helps reduce buffering, delays, or sudden pauses while watching Disney+ on your TV.
Step 3: Open Disney+ on Your Apple Device
Launch the Disney Plus app on your iPhone or iPad, or open Disney Plus in Safari on a Mac.
Sign in to your account and wait for the home screen to fully load. It is important that both your device software and the Disney+ app are up to date.
Updates often fix small issues that can affect streaming or prevent the AirPlay option from working properly.
Step 4: Use AirPlay to Start Streaming
Choose the movie or TV show you want to watch and press play on your iPhone, iPad, or Mac. Once the video starts, tap the AirPlay icon shown on the player screen.
A list of available devices will appear. Select your TV or Apple TV from the list. After a short pause, the video will move to your TV screen.
Your Apple device will now control playback, allowing you to pause, play, rewind, or change the volume while watching.
How to Cast Disney+ on Smart TVs Without Chromecast?
Casting Disney+ on a smart TV without Chromecast is a simple option when your TV supports the app or built-in casting. It removes the need for extra devices and keeps streaming steady.
You can use this method if:
- Your smart TV has the Disney+ app available
- Your TV supports built-in casting or AirPlay
- Your TV and phone are on the same Wi-Fi network
- You prefer streaming directly from the TV
Start by installing Disney+ from your TV’s app store and signing in. If your TV allows casting, you can also play content from your phone.
Using the TV app often gives smoother playback since the video runs directly on the TV system.
How to Fix Disney+ Casting Issues on TV?
This section focuses on less obvious Disney+ casting issues and quick fixes, helping you solve problems that may still happen even after proper setup.
- Cast Icon Missing: If the cast icon does not appear, close the Disney+ app completely and reopen it. This refreshes the player and often brings the option back.
- Casting Stops Suddenly: If playback stops mid-stream, check for background apps running on your device. Closing unused apps can improve stability during casting.
- Video Plays but No Sound: Audio issues may come from TV sound settings. Check volume levels, audio output settings, and try switching sound modes on your TV.
- Black Screen on TV: A black screen usually means a temporary handshake issue. Stop casting, wait a few seconds, and start casting again from the app.
- App Freezes While Casting: Force close the Disney+ app and reopen it. Freezing can happen after long usage sessions without restarting the app.
- Delayed Response to Controls: If pause or play reacts slowly, wait a moment before tapping again. Network delay can cause input lag during casting sessions.
By following these simple steps, you can fix most Disney+ casting issues and enjoy uninterrupted streaming on your TV. Keep your app and devices updated for smoother performance.
Conclusion
Casting Disney+ becomes much easier when you follow the right steps for your device and understand how each option works.
Small details, like keeping your app updated and checking device settings, often decide how smooth your streaming experience feels.
When issues appear, most can be fixed quickly without extra equipment or paid tools. Knowing where to check saves time and keeps your viewing uninterrupted.
This blog post is meant to help you stream with confidence and avoid repeat problems in the future. Keep it handy whenever you change devices or update your setup.
If you run into a problem that isn’t covered here or have a tip that worked for you, leave a comment below.
Your comment can help others and improve this post for everyone who wants simple, stress-free Disney+ streaming.