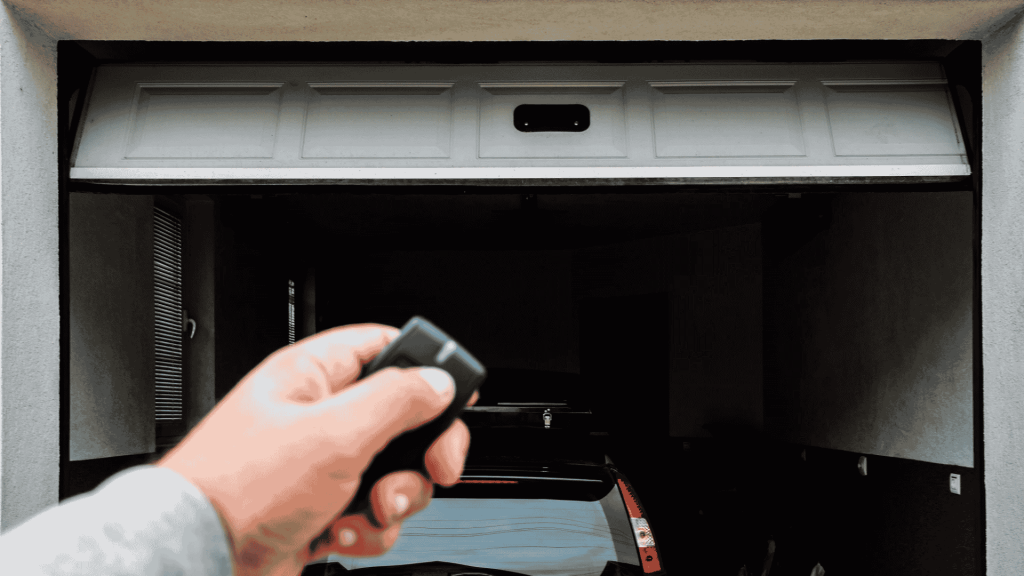
Have you ever stood at the bottom of your driveway, watching your garage door stubbornly refuse to close?
That simple task of closing your door should never be this complicated.
Often, the problem lies with misaligned garage door sensors, those small, often overlooked components that play a huge role in keeping your home safe.
Imagine the satisfaction of fixing it without calling in a professional, as it’s easier than you think.
Understanding how to align garage door sensors can save you time, money, and unnecessary stress. And the best part is you don’t need any fancy tools or technical skills.
With just a few steps, you can restore your garage door’s full functionality and enjoy peace of mind knowing it’s working just the way it should.
What Garage Door Sensors Are & Why They Matter?
Garage door sensors are an essential safety feature that detect obstructions in the door’s path, preventing accidents.
Typically placed a few inches off the ground on both sides of the garage door, these sensors create an invisible beam.
When something blocks the beam, the sensors trigger the door to reverse, ensuring that the door doesn’t close on people, pets, or objects.
Misaligned sensors often cause the door to refuse to close or to reverse unexpectedly.
Therefore, understanding how these sensors work and why they matter is crucial for maintaining both the functionality and safety of the garage door system.
Tools Required to Align Garage Door Sensors
Before you begin realigning your garage door sensors, it’s essential to gather a few simple tools and materials. Having the right items on hand will ensure the process goes smoothly.
- String: It helps create a visual guide for sensor alignment.
- Bracket: Keeps the sensors in place during adjustments.
- Tightening tools (screwdriver or wrench): To secure loose bolts or screws.
- Power source check (flashlight): It ensures that the sensors are powered.
- Tape: It ensures that the string is straight and guides the sensor beams.
How to Align Garage Door Sensors?
Aligning the garage door sensors can seem tricky, but it’s a simple process that can help keep the door working properly. Whent he sensors aren’t aligned, the door may behave erratically.
Step 1: Check for Sensor Power and Obstructions
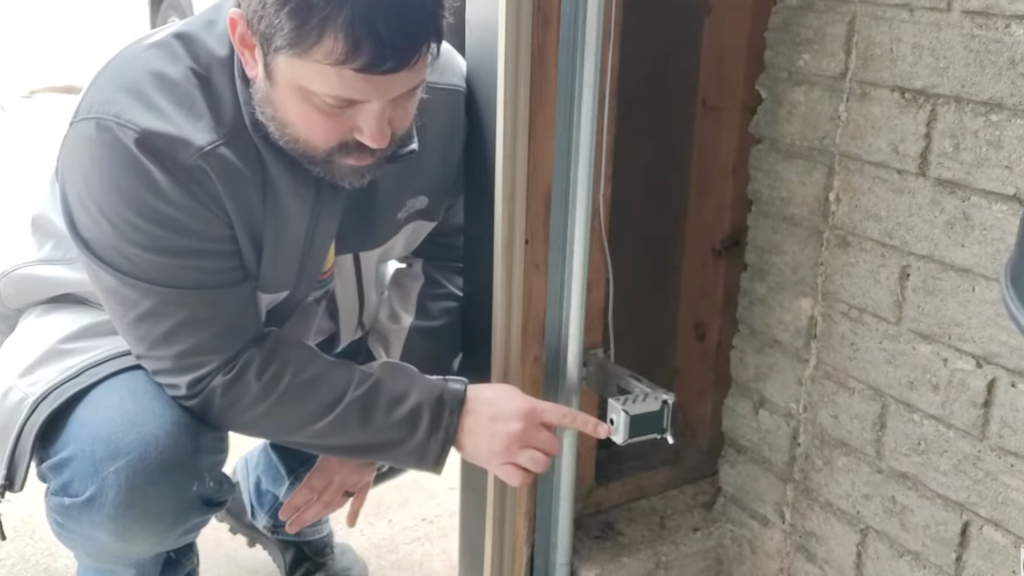
Before jumping into alignment, ensure the sensors are powered and free of obstructions.
Look for a light indicator on each sensor. The sending sensor should have a steady light, while the receiving sensor might show a flashing or no light if it’s misaligned.
If one of them doesn’t show a light, it could be due to an obstruction of the infrared beam or an alignment issue.
Clear any objects between the sensors to prevent them from interfering with the beam.
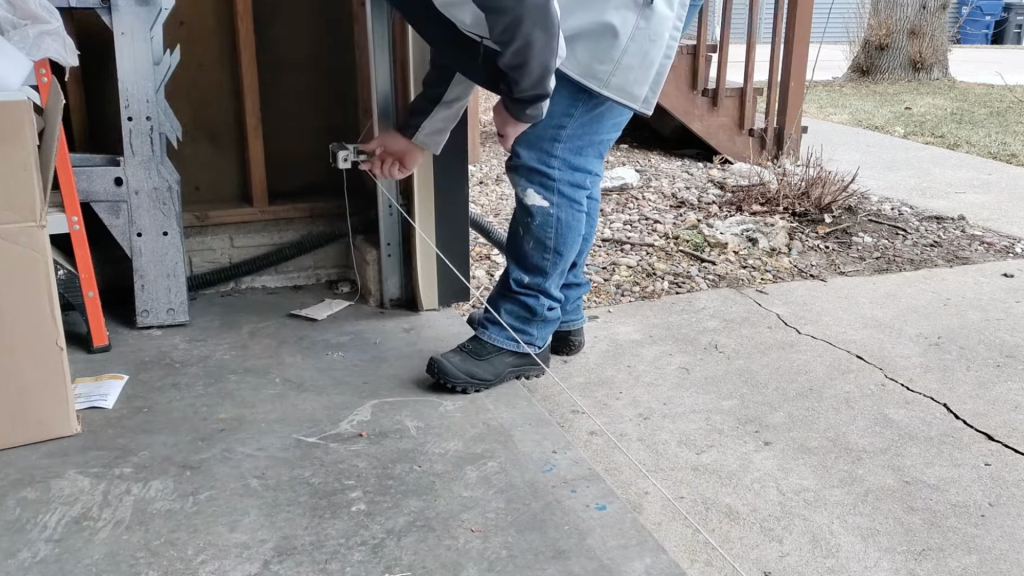
Step 2: Use a String for Sensor Alignment
Now that its ensured that there are no obstructions, it’s time to align the sensors. One of the easiest ways to do this is by using a string.
Take a piece of string and wrap it around the bracket of the first sensor. Then, run the string to the second sensor and wrap it around there as well.
The string should be tight but not overly so. It acts as a guide for the sensor beams. Check if the beams follow the string’s path closely.
If not, adjust the sensors to align them with the string for proper beam connection.
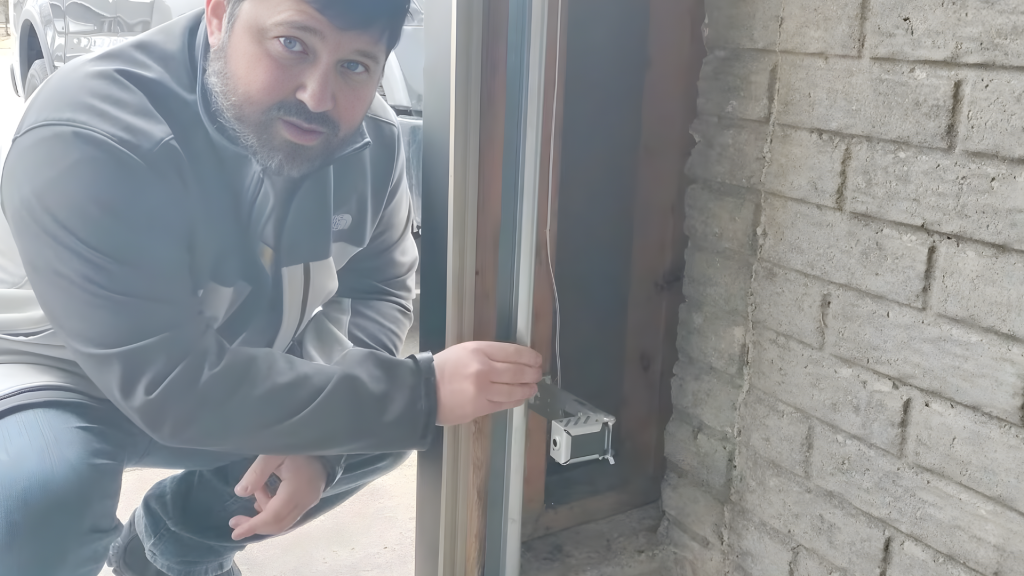
Step 3: Fine-Tune the Sensor Position
Once the string is in place, take a step back and check the alignment from a distance.
If the sensor beams don’t line up with the string, adjust the sensors by moving them left, right, up, or down.
After adjusting, make sure both sensors are aligned with each other and that the beam flows smoothly from one sensor to the other.
Double-check the light indicators on both sensors as they should both be on and aligned correctly.
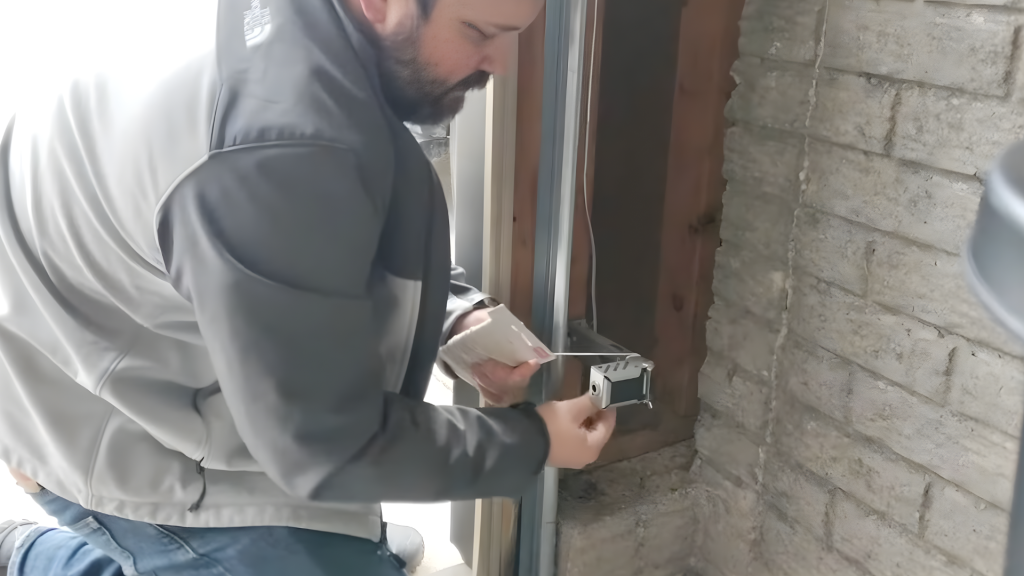
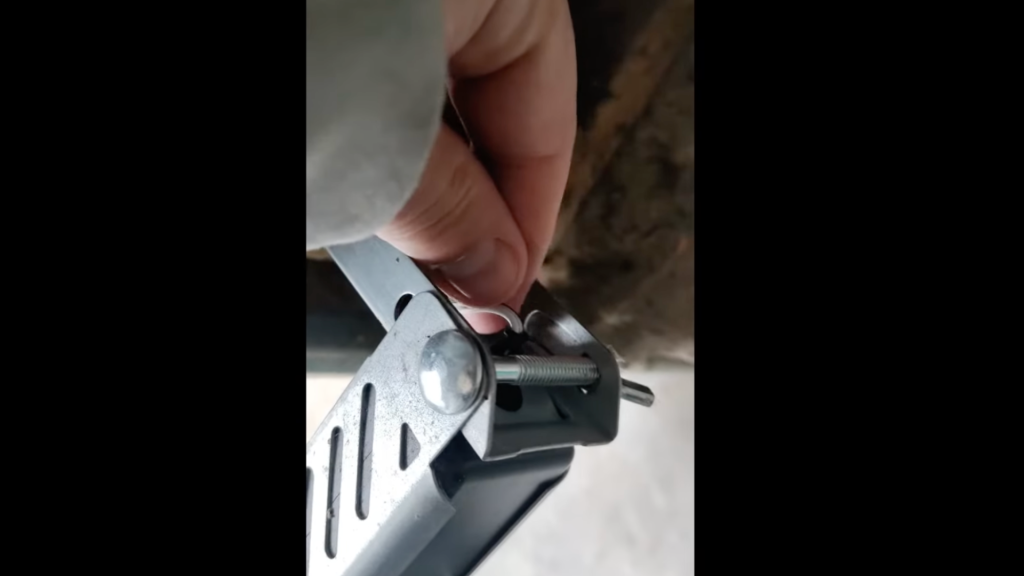
Step 4: Check the Rail and Bracket
If the sensors still aren’t working correctly, take a closer look at the rail and bracket that hold the sensors in place.
Over time, the rail can loosen due to the constant movement of the garage door, causing the sensors to shift out of alignment.
This slight movement can cause misalignment, making it harder for the sensors to detect each other’s beams. Check if the rail is securely attached to the wall.
If it feels loose or wobbly, tighten it up to ensure it stays in place. Make sure to tighten all screws and bolts, ensuring the rail and bracket are firmly in place.
Step 5: Inspect the Wiring
Sometimes, sensor issues come from wiring problems. Check the wires connected to the sensors, especially the ones behind them.
If any wiring is loose, frayed, or pinched, it could cause the sensors to malfunction.
Ensure the wiring is securely attached and not damaged. If you find any issues, consider replacing or repairing the damaged wiring.
Also, check if any staples or tight connections are affecting the wiring near the sensors.
Step 6: Test the Sensors
Once all necessary adjustments are made, it’s time to test the sensors.
Close the garage door and see if it operates smoothly without reversing. If the door closes without any problems, the sensors are successfully aligned.
If the door still acts up, repeat the alignment process or check for other issues, such as damaged wiring.
Testing ensures everything is functioning properly, and the garage door is safe to use.
This tutorial is based on a helpful video by Home Repair Hub. You can check out the original video on their YouTube channel here or watch it below.
How to Identify Misaligned Garage Door Sensors?
If the garage door sensors are misaligned, several signs may indicate an issue.
The most common symptom is the door failing to close or reversing unexpectedly before it touches the ground.
This happens because the sensors are unable to detect the alignment of the invisible beam, triggering the door to reverse for safety.
Another clear sign is blinking or flashing indicator lights on the sensors, which typically indicate a misalignment or obstruction.
Additionally, one may experience inconsistent operation, such as the door stopping or hesitating during its movement, even when no visible obstruction is present.
If any of these symptoms occur, it’s likely that the sensors need realignment to restore proper functionality and ensure the garage door’s safe operation.
Mistakes to Avoid While Aligning the Garage Door Sensors
When aligning garage door sensors, it’s important to follow the proper steps, but common mistakes can hinder the process or even cause further damage to the garage door.
- Overtightening Screws: Tightening the sensor mounting screws beyond the recommended torque can cause the sensors to misalign again, leading to recurring issues.
- Neglecting Sensor Cleaning: Failing to clean the sensor lenses can obstruct the beam, even if the alignment is correct, causing a malfunction.
- Incorrect Sensor Height: Mounting sensors at different heights can cause misalignment, preventing them from properly detecting the beam.
- Not Checking Indicator Lights: Forgetting to verify the LED lights after realigning can leave the problem unresolved.
- Ignoring Obstructions: Overlooking debris or obstructions in the sensor’s path can lead to misalignment or faulty sensor operation.
Essential Tips to Keep Garage Door Sensors Aligned
Maintaining the garage door sensors is crucial for ensuring long-term functionality and safety. Regular checks and care can prevent misalignment and enhance the door’s overall performance.
- Clean the Sensors Regularly: Dust, dirt, or spider webs can obstruct the sensor’s beam, causing malfunctions.
- Check Sensor Alignment: Periodically inspect the sensors to ensure they are aligned at the same height and facing each other directly.
- Inspect Wiring for Damage: Look for loose or frayed wires that may cause the sensors to malfunction.
- Tighten Mounting Brackets: Screws may loosen due to vibration, so tighten them to avoid shifting the sensors out of alignment.
- Monitor Indicator Lights: Pay attention to the LED lights; if they blink or flash, it may indicate misalignment or another issue.
Conclusion
Proper alignment of your garage door sensors is essential for safe and smooth operation.
Misaligned sensors can cause unexpected door reversals or prevent doors from closing, creating safety hazards.
Realigning these sensors is a simple DIY task that only requires a few basic tools, such as a screwdriver and a level.
By taking the time to align your sensors correctly and performing regular maintenance, you can prevent future issues and ensure your garage door operates reliably for years to come.
Remember to check the sensors periodically to avoid potential problems down the line. Stay ahead of potential malfunctions and keep your garage door in top condition.
Have you aligned your garage door sensors before?
Share your tips or any challenges you faced in the comments below.