If you’re thinking about securing your property with an access control system, you’re in the right place.
These systems help regulate who can enter your building and when, offering both convenience and security.
In this guide, I’ll share the basics of installing access control systems, from understanding how they work to selecting the right one for your needs.
If you’re setting it up for your home or a business, I’ll share the steps and things to consider to make the process as easy as possible. By the end, you’ll feel confident in choosing and installing a system that keeps your property safe.
Let’s get started on securing your space with the right access control system!
What does Access Control Installation mean?
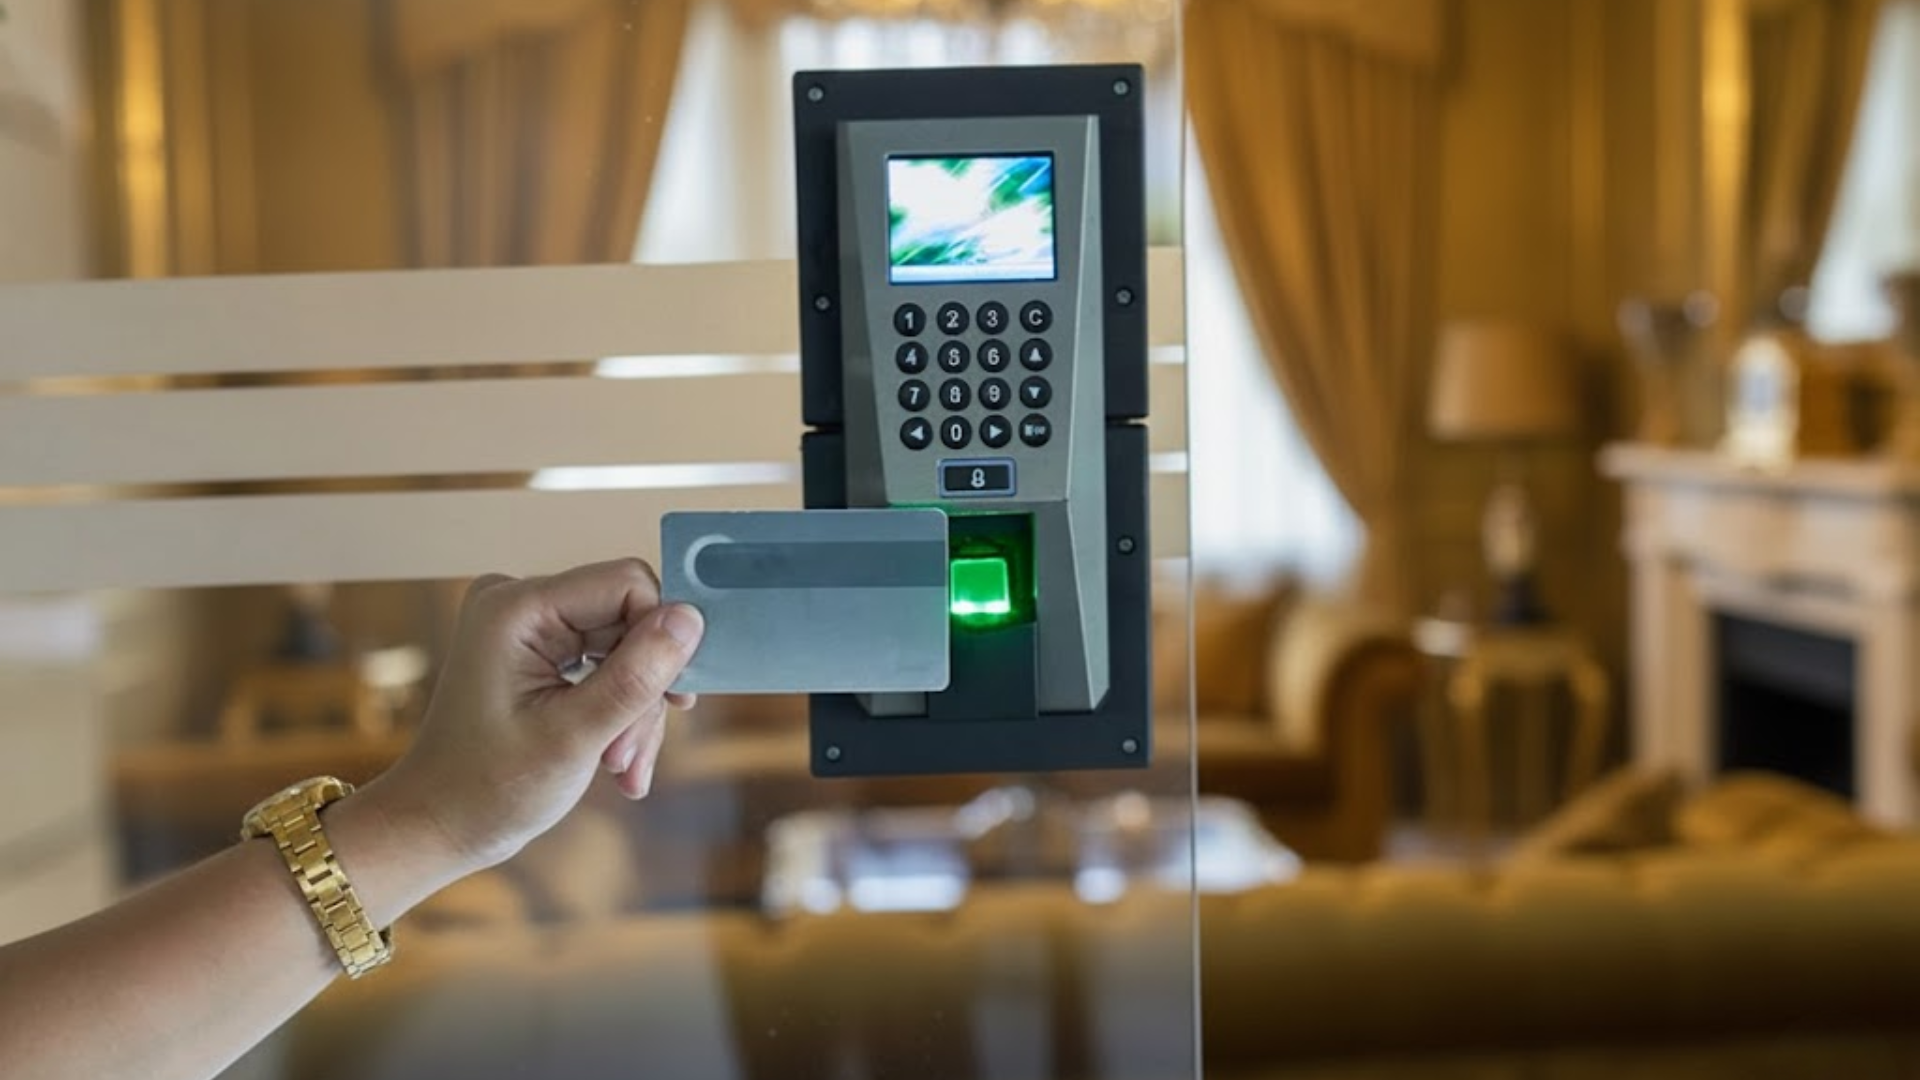
Access control installation refers to the process of setting up systems that manage and regulate entry to buildings, rooms, or restricted areas.
These systems replace traditional locks with keypads, key cards, fobs, biometrics, or mobile credentials.
The installation process includes mounting hardware, running and connecting wiring, configuring power supplies, and programming user permissions.
Proper alignment of door hardware, such as electric strikes or magnetic locks, is essential for reliable operation.
Access control installation helps improve security by limiting access to authorized users and tracking entry activity.
It is commonly used in offices, schools, warehouses, and healthcare facilities to enhance safety and control movement within a property.
When installed correctly, these systems provide consistent performance, reduce unauthorized access, and allow administrators to manage entry changes efficiently without replacing physical locks.
How to Install an Access Control System?
Begin by assessing the site’s layout, identifying entry points, security requirements, and determining the most suitable system configuration for your needs.
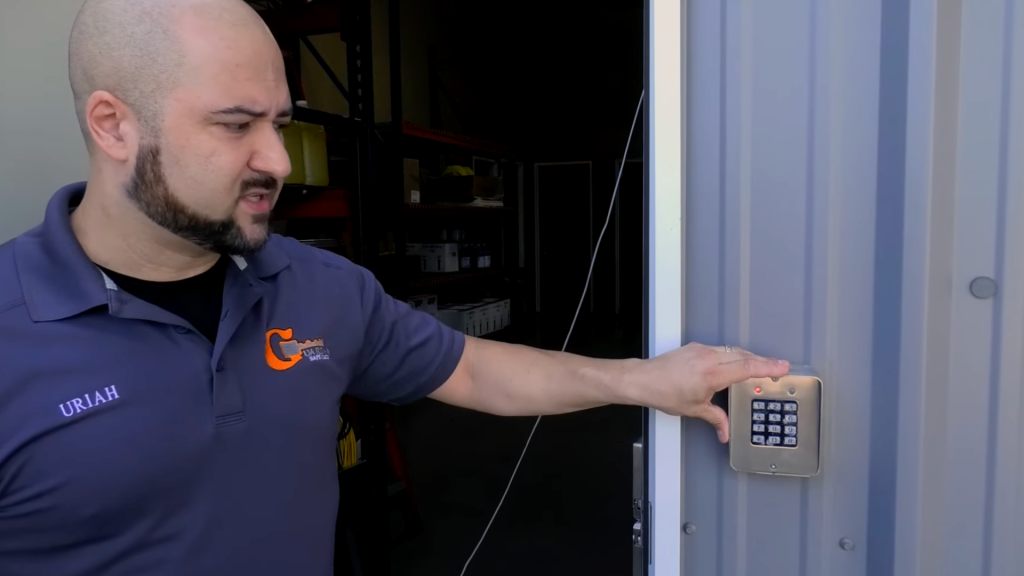
Step 1: Site Assessment and Project Overview

The installation starts with a site walkthrough to assess door, wall, and frame conditions.
The keypad mounting location is selected, and the surface-mount electric strike is positioned on the door frame. If there are existing systems, they are reviewed to maintain consistency.
The project scope is confirmed, including the expected completion time and wiring paths.
Power availability and potential moisture risks are also considered to ensure the system operates smoothly in any environment.
Step 2: Selecting and Preparing Access Control Hardware
Next, the required hardware is selected and prepared. A standalone keypad for wall mounting and a surface-mount electric strike for controlled entry are chosen.
The keypad can manage multiple user codes, making it ideal for employee access.
The electric strike remains locked until the correct code is entered, releasing and relocking automatically.
Voltage compatibility is verified, mounting surfaces are cleaned, and sealant is prepared to protect against moisture intrusion.
Step 3: Running and Routing Access Control Wiring
Wiring is routed from the keypad to the electric strike and power source, typically through wall cavities and ceiling spaces.
The wiring is concealed for a clean and secure installation. Tools like magnets and wire guides help navigate tight spaces inside door frames and walls.
Service loops are added to make future maintenance easier without stressing the wires.
Proper wire management ensures that cables are protected from damage, which is essential for maintaining system reliability.
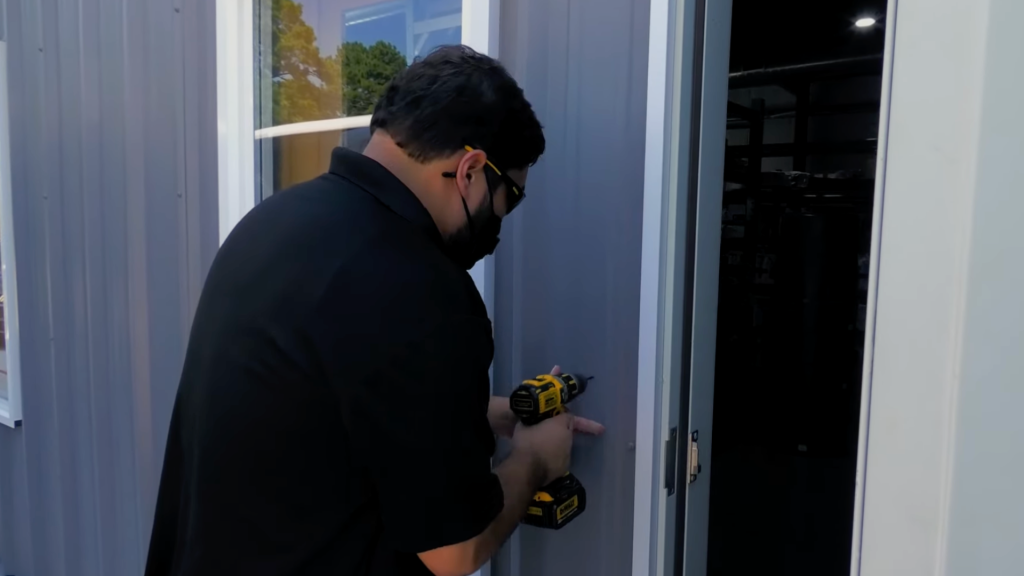
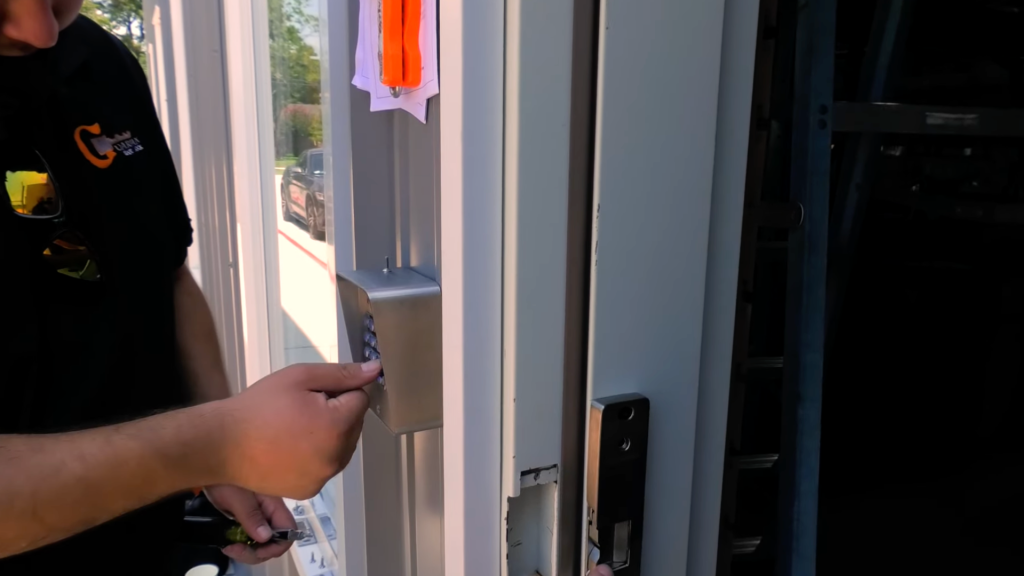
Step 4: Mounting the Keypad and Sealing the Installation
Once the wiring is in place, the keypad’s mounting location is measured and marked for accurate alignment. Holes are drilled carefully to avoid damage to surrounding surfaces.
The keypad is securely mounted, and silicone sealant is applied around the edges to prevent moisture from entering.
The keypad is leveled and tightened into place, and the wiring harness is connected according to manufacturer guidelines.
This sealed installation protects internal components and ensures consistent performance in both indoor and semi-exposed environments.
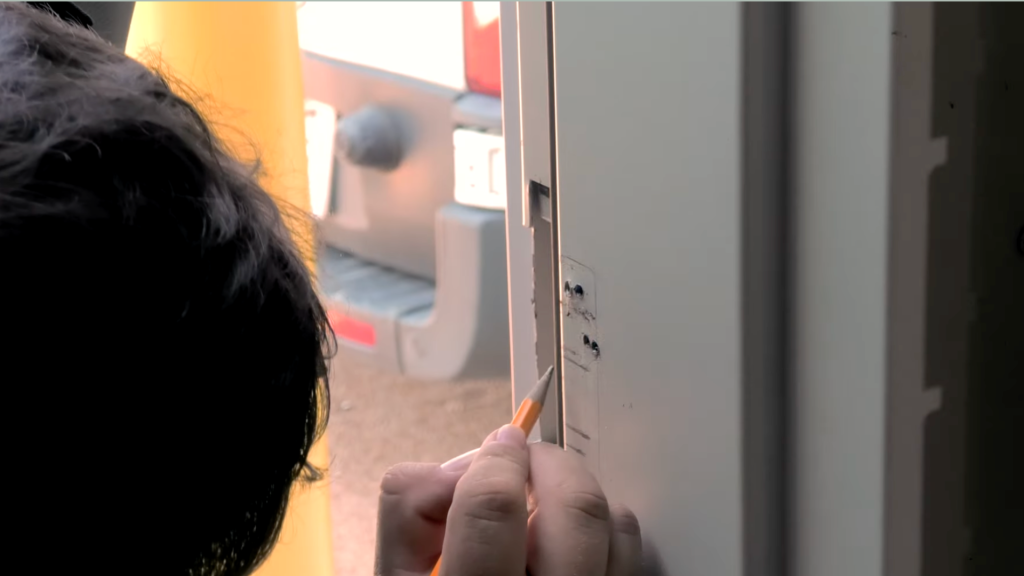
Step 5: Installing and Aligning the Electric Strike
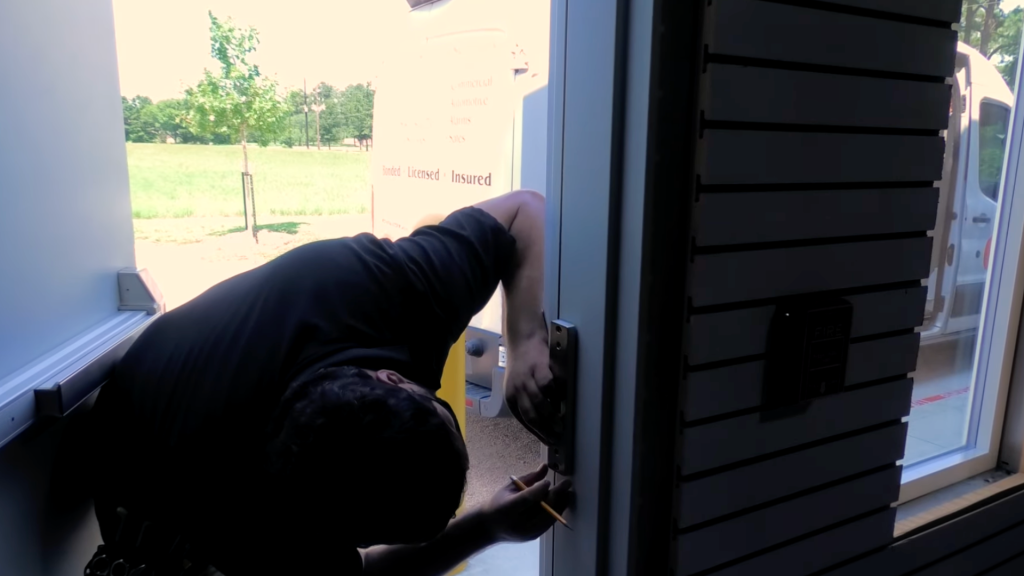
The electric strike is positioned inside the door frame and aligned with the door latch for smooth operation.
Adjustments are made to account for frame flexibility or uneven surfaces, and the strike is secured with screws or appropriate fasteners.
The latch is manually tested to ensure it seats properly within the strike opening.
Any issues with binding or pressure are corrected before final wiring. Proper alignment prevents premature wear and ensures reliable access when the system is active.
Step 6: Power Supply Setup and System Wiring

A dedicated power supply is installed to support the access control system.
Voltage settings are confirmed to match the keypad and electric strike requirements. Wiring connections are made securely using connectors to ensure stable electrical flow.
The keypad is connected to the strike and power supply, and power indicators, such as LED lights, are checked.
Clean wiring and correct polarity are essential for the consistent operation and long-term reliability of the system.
Step 7: Testing and Adjustments
The complete access control system is tested to ensure proper function.
The programmed code is entered on the keypad to confirm that the electric strike releases as intended.
The door is verified to relock automatically once closed. Additional adjustments, such as door closer tension or latch pressure, are made if necessary.
All mounting hardware is rechecked for stability, and the system is tested multiple times to ensure consistent performance. Once everything is verified, the system is secure and ready for daily use.
This tutorial is based on a helpful video by Guardian Safe & Lock. You can check out the original video on their YouTube channel here or watch it below.
How Much Does it Cost to Install Access Control?
Access control installation costs usually fall between$1,200 and $8,000 per door. Most commercial projects average $2,500 to $4,500 per door, covering card readers, locks, panels, cabling, and professional labor.
Basic systems like keypads or key fobs often start around $500 to $1,800 per door.
More advanced options, such as biometric or smartphone-based systems, can range from $4,000 to $10,000 per door.
Final pricing depends on several factors, including the number of doors, building size, and existing infrastructure. Software licensing typically adds $200 to $1,600 per door each year.
Labor costs also vary by location, with higher rates in cities like New York or San Francisco.
Common Mistakes to Avoid During Access Control Installation
Proper installation ensures a secure and reliable system. Here are some common mistakes to avoid for a smooth setup.
- Incorrect Wiring: Failing to route and secure wires properly can lead to connection failures and malfunctions.
- Poor Keypad Placement: Installing the keypad at an incorrect height or location may affect accessibility and user experience.
- Improper Alignment of Electric Strike: Misalignment can cause the strike to malfunction, leading to door resistance or failure to lock.
- Overlooking Power Supply Requirements: Using an incompatible power supply can cause system instability or failure to operate.
- Neglecting Environmental Considerations: Not accounting for moisture, temperature fluctuations, or exposure to harsh elements can damage components.
- Skipping System Testing: Failing to thoroughly test the system after installation can leave security vulnerabilities unnoticed.
- Forgetting to Label Wiring: Unlabeled wires can cause confusion during troubleshooting or maintenance.
Conclusion
I’ve learned that planning security upgrades is not just about price but about long-term value, reliability, and daily convenience.
Choosing the right system involves balancing upfront costs with maintenance, scalability, and ease of management.
I suggest reviewing door counts, software fees, and labor rates early so there are no surprises later.
A well-planned access control installation can improve safety, streamline operations, and support business growth without constant upgrades.
Working with certified professionals also helps avoid downtime and ensures code compliance from day one.
Investing wisely now saves money and stress later while keeping people and property protected.
This approach builds confidence and peace. Ready to secure your space the smart way? Share your thoughts, ask questions, or tell me your goals in the comments below.